Welcome winter.

Quando pensiamo al freddo inverno, i pensieri si lasciano trasportare verso una tazza bollente di cioccolata calda o al the con i biscotti. Oppure al caffè, lungo, magari quello di Starbucks, in vari gusti e profumi, servito nei caratteristici bicchieri di cartoncino.
Tempo fa ho scoperto che questi bicchieri (puliti s’intende), vengono utilizzati per creare le copertine di meravigliosi minialbum coffe cup.
Per questo progetto ho preso spunto da Wilna Furstenberg: se visitate il suo blog (o il profilo instagram), trovate veramente di tutto!
When we think of the cold winter, thoughts are transported to a hot cup of hot chocolate or tea with biscuits. Or coffee, long, maybe Starbucks, in various flavors and aromas, served in the characteristic cardboard cups.
Some time ago I discovered that these glasses (cleaned of course), are used to create the covers of wonderful minialbum coffe cup.
For this project I was inspired by Wilna Furstenberg: if you visit her blog (or the instagram profile), you really find everything!
Il gruppo Mixed Medi@ Italia per il mese di dicembre ( dal 1° al 25) ha organizzato un calendario dell'avvento: alcune persone iscritte al gruppo e le amministratrici, proporranno dei loro progetti a scelta (card, tag, home decor, minialbum, ecc) ovviamente mixed media e con un tocco di rosso. Questi gli hashtag da seguire: #mixedmediaitalia #avventoMMI
Avendo aderito all’evento ho pensato di proporre un minialbum, coffe cup per l’appunto. Preparatevi ad un tutorial fotografico.
The Mixed Medi@ Italia group for the month of December (from the 1st to the 25th) organized an advent calendar: some people registered to the group and the administrators will propose their projects of their choice (card, tag, home decor, minialbum) , etc.) obviously mixed media and with a touch of red. These hashtags to follow: #mixedmediaitalia #avventoMMI
Having joined the event I thought to propose a minialbum, coffe cup for the note. Get ready for a photo tutorial.
Per questo progetto non ho utilizzato un bicchiere di Starbucks, ma del cartoncino bianco.
Nelle risorse free del blog di Wilna Furstemberg, ho scaricato il file della copertina che ho elaborato e tracciato nel programma Studio della silhouette cameo.
Con questo disegno ne ho creato uno più piccolo per le pagine interne. Poi li ho stampati e ritagliati a mano.
Da una foglio Fabriano A4 da 220 gr ho tagliato 2 volte la copertina e con il più piccolo ho tagliato le 3 pagine interne.
Per rafforzare la copertina, con la macchina da cucire l’ho cucita tutta intorno. Ho poi passato l’esterno con del gesso un po’ diluito ed ho asciugato con l’embosser. Per il colore ho utilizzato gli acquerelli della Kuretake, molto intensi.
Con un pennello ho bagnato il color tiffany e, con la copertina in piedi, l’ho fatto colare dal bordo, in modo che si creassero delle gocce. Poi sono passata al colore successivo, un azzurro seguendo lo stesso procedimento. Mentre la copertina si asciugava bene ho passato il gesso sulle pagine interne, prima un lato e, dopo aver asciugato bene, dall’altro. Poi, solo con il colore azzurro, ho passato delle pennellate a caso e fatto colare dal bordo. Con lo stesso colore ho fatto anche delle goccioline.
For this project I didn't use a glass of Starbucks, but some white cardboard.
In the free resources of the blog of Wilna Furstemberg, I downloaded the cover file that I have elaborated and traced in the studio program of the cameo silhouette.
With this design I have created a smaller one for internal pages. Then I printed them and cut them by hand.
From a Fabriano A4 220 gram sheet I cut the cover twice and with the smallest I cut the 3 inside pages.
To strengthen the cover, I sewed it all around with the sewing machine. Then I passed the outside with some diluted chalk and dried with the embosser. For the color I used Kuretake watercolors, very intense.
With a brush I wet the tiffany color and, with the cover on my feet, I drew it from the edge, so that drops were created. Then I switched to the next color, a blue following the same procedure. While the cover was drying well I passed the plaster on the inside pages, first one side and, after drying well, on the other. Then, only with the blue color, I passed random brush strokes and dripped from the edge. I also made some droplets with the same color.


Quando si sono asciugate ho utilizzato vari stencil con la modelling past.
Ho usato nell’ordine questi stencil: Constellation di Carabelle studio; Layering di Tim Holtz collection e Texte manuscrit sempre di Carabelle studio. Successivamente, con lo stencil Stelle e farfalle della Coppia Creativa ho passato con la nuvo oro le stelline, solo in alcune zone.
Ho spatasciato dei fogli con gli acquerelli: alcuni con tiffany ed azzurro, alcuni con dei verdi ed altri ancora con dei rossi.
When they dried, I used various stencils with past modeling.
I used these stencils in order: Constellation by Carabelle studio; Layering by Tim Holtz collection and Texte manuscrit always by Carabelle studio. Subsequently, with the stencil Stars and butterflies of the Creative Couple I passed with the new gold stars, only in some areas.
I have dirty sheets with watercolors: some with tiffany and blue, some with greens and others with reds.


Una volta asciutti ho fustellato rametti, alberelli di Natale, ghirlande e guanti (tutti Simply Graphic). Santa Sidekick!! La sorellina della Big shot è l’ideale per le fustelline piccole!!
Per la copertina, prima di incollare l’abbellimento principale, con il pennello e la nuvo oro un po’ diluita e poi con del gesso, ho spruzzato tante goccioline. Le stesse goccioline le ho fatte anche sulle pagine interne.
Dopodichè ho fustellato un banner su carta a pois, al quale ho aggiunto, in sovrapposizione, ghirlanda, rametti ed una rete dorata. Con uno zig clean brush ho colorato alcune bacche che ho poi ricoperto con il glossy accent.
Prima di incollare con il biadesivo spessorato, ho messo del twine bianco e rosso.
Sopra tutto ho posizionato uno sticker della collezione Snow and Cocoa di Crate Paper. Per finire con la nuvo Crystal glace ho creato tante goccioline.
Dal foglio colorato di rosso ho fustellato un fiocco (non mi ricordo la marca perché le tengo in un raccoglitore con fogli calamitati e tolgo l’imballo originale. Di solito ritaglio la marca per futura memoria ma di questa specifica fustella non la trovo).
L’ho composto e poi l’ho ripassato completamente sempre con il glossy accent.
Per accentuare l'effetto "neve", con le dita ho passato del gesso bianco sulle fustellate.
All’interno la copertina l’ho ricoperta con della carta perché non piacevano le cuciture dal rovescio.
La copertina è pronta, non resta che assemblare il tutto.
Con la Big bite ho fatto 3 buchi: 1 al centro e 2 a 3 cm dal bordo. Ho poi accostato un foglio interno ed ho fatto un segno per gli altri buchi.
Per cucire le pagine alla copertina ho usato un ago grosso e del filo bianco un po’ spesso. Non le ho sovrapposte ma cucite singolarmente.
Once dry I punched twigs, Christmas trees, garlands and gloves (all Simply Graphic). Saint Sidekick!! The little Big shot sister is ideal for small punches !!
For the cover, before gluing the main embellishment, with the brush and the slightly diluted gold nuvo and then with chalk, I sprayed many droplets. I also made the same droplets on the inside pages.
Then I punched a banner on polka dot paper, to which I added, overlapping, wreath, twigs and a golden net. With a zig clean brush I colored some berries that I then covered with glossy accent.
Before sticking with the thickened double-sided adhesive tape, I put some white and red twins.
Above all, I placed a sticker from the Snow and Cocoa collection by Crate Paper. To finish with the new Crystal glace I created a lot of droplets.
From the red colored sheet I punched a bow (I do not remember the brand because I keep them in a binder with magnetized sheets and I remove the original packaging.I usually cropping the brand for future memory but of this specific die I can not find it).
I composed it and then I completely reviewed it again with the glossy accent.
To accentuate the "snow" effect, with my fingers I passed some white chalk on the punches.
Inside I covered the cover with some paper because I did not like the stitching from the back.
The cover is ready, you just have to assemble everything.
With the Big Bite I made 3 holes: 1 in the middle and 2 to 3 cm from the edge. I then put a piece of paper inside and made a mark for the other holes.
To stitch the pages to the cover I used a thick needle and some thick white thread. I have not overlapped but sewn individually.


Il minialbum è pronto, ora non resta che abbellire le pagine con il proprio gusto.
Io ho utilizzato varie fustellate, filo oro come non ci fosse un domani ed abbellimenti: stickers e carte della collezione Snow and Cocoa, Chipboard della Toga, stickers puffy American Crafts.
Ho anche creato 2 bustine con la fustella di Tim Holtz.
Tutto il materiale utilizzato fa parte del kit che ho preparato per Crea il tuo kit con Angela e Giorgia.
Ed ora le foto con i particolari delle pagine interne.
The minialbum is ready, now all that remains is to embellish the pages with your own taste.
I used various dies, gold thread and embellishments: stickers and cards from the Snow and Cocoa collection, Toga Chipboard, American Puffy puffy stickers.
I also created 2 sachets with Tim Holtz's punch.
All the material used is part of the kit I have prepared for Create your kit with Angela and Giorgia.
And now the photos with the details of the inside pages.


A me è piaciuto molto realizzarlo. Spero piaccia anche a voi!
Grazie per essere passati.
I really liked to make it happen. I hope you like it too!
Thanks for stopping by me
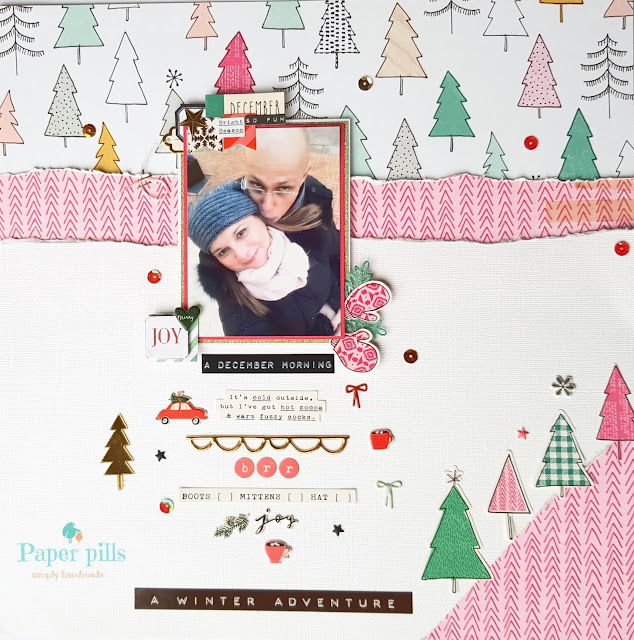
Challenge:
CSI color stories inspiration - Case File #267: inspired by colors.
Evidence: dots, Christmas/holiday elements, tags, stars, animals, winter elements, buttons, garland/banner, stamps, bows.
Testmony: Document something about the holidays - Put your journaling on a tag that's attached to something on your page,reminescent of a gift tag.
Inspiration words: joy

Bellissimo! E l'idea del riciclo dei bicchieri è fortissima! Prendo nota! Grazie per aver partecipato al calendario dell'avvento!😘😘😘
RispondiEliminaGraziee Terelisa!!
EliminaMeraviglia delle meraviglie😍😍😍😍😍
RispondiEliminaSei un tesoro!!!
EliminaStefania...sono in estasi! Grazie per aver partecipato al nostro Calendario...per aver condiviso tanta bellezza...io ti segno già per il prossimo! 😂 un abbraccio ❤
RispondiEliminaGrazie Simo!! E grazie a voi per aver reso possibile questo evento!!
EliminaWhat an absolutely gorgeous project! So happy to have you playing with us at CSI!
RispondiEliminaLove the idea and the bright cover))
RispondiElimina